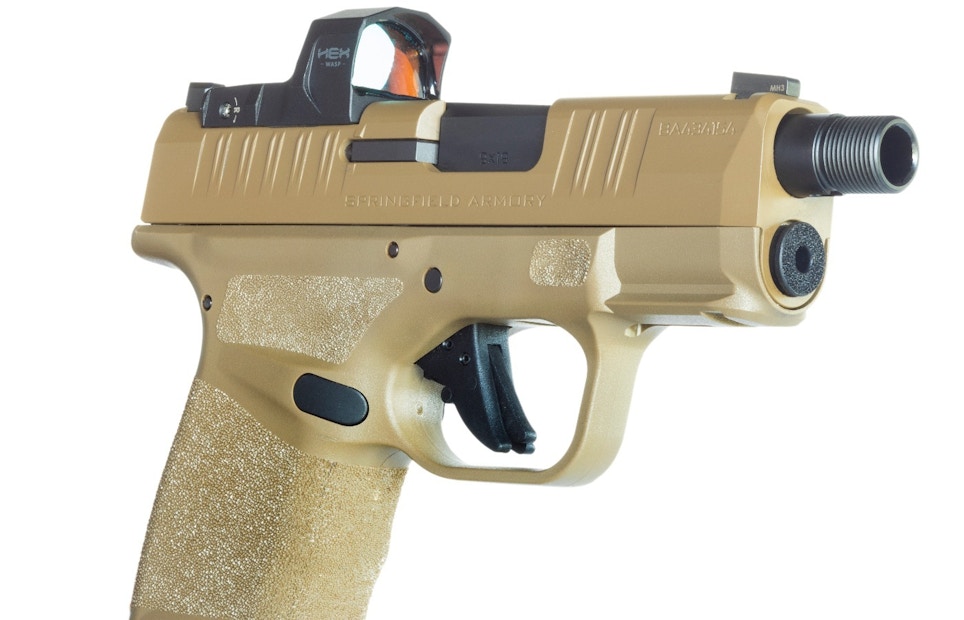
Tactical retailers know muzzle devices are growing in popularity, particularly suppressors. Their sales increased exponentially with the release of ATF’s new eForm, which brought enviable speed and ease to a purchase that once required waiting nearly a year before taking possession of a new can.
Mounting one requires a properly threaded barrel, however, and not every pistol made today comes with that asset. It’s frustrating for owners ready to upgrade a favorite handgun and even a deciding factor when selecting a new model.
Thankfully, there’s refreshing modularity in modern polymer pistols, and several companies produce aftermarket threaded barrel kits capable of dropping right in and functioning flawlessly. A few are available direct from the original gun manufacturer, ensuring 100% compatibility and reliability. They include a thread protector, but some also with muzzle brakes — even self-indexing versions, like the one used here for illustration.
Replacing a stock barrel is field-stripping-fast on most models, making it an ideal countertop service. It is important, however, to remember that 1911s and others do not lend themselves to fast and effortless swaps. Filing, machining and polishing can be mandatory in those cases to provide the reliable performance that builds a long-term customer relationship. Know the product before ordering and check reviews to make the right choice.
Once you’ve determined the right aftermarket barrel kit, open the package and consult the instructions. Inventory parts to ensure everything arrived safely — usually only two pieces — then inspect for cosmetic or mechanical imperfections. Pay close attention to the muzzle’s threads, where inadvertent dings during shipping can prevent proper mounting.
Then screw the thread protector on — or off if it came pre-mounted. Do the same with any brake included. Invest time now to discover problems, rather than uncovering them after completing this process.
As always, safety is first and foremost. Keep the customer’s pistol pointed in a safe direction and engage any manual safety it has. Then drop the magazine and remove it from your immediate work area.
Rack the slide back and inspect the chamber to ensure no cartridge remains. Remove any you find, and always double check the gun is empty. Use a flashlight if necessary.
Now you’re ready to field-strip the pistol. The procedure often varies by manufacturer and model, although odds are good you’re intimately familiar with the process. It usually begins with moving the slide back, then aligning and engaging the slide lock to hold it firmly in place.
Rotate the takedown lever up front and then ease the slide — along with barrel and spring assembly underneath — off the pistol. It may take another manipulation in some cases, including depressing the trigger. Consult the manufacturer’s website if needed. After removing the slide, note the orientation of the recoil spring and guide rod. Take a snapshot with your phone if you’re unfamiliar with the assembly.
Then apply firm pressure at the back of the spring and recoil rod assembly and lift it off. You can now remove the original barrel from the slide.
Clean parts if necessary. Lightly oil those going back onto the pistol, then insert the aftermarket threaded barrel. Replace the recoil spring(s), double checking for proper orientation and indexing on the slide and barrel.
Align the slide assembly with the handgun’s grooves and slide it back onto the firearm. Push it all the way back until the slide lock aligns with its groove and engage the mechanism.
Once the unit is firmly held in place — with the chamber exposed — rotate the slide lock to its closed position. Apply firm rearward pressure on the slide, depress the slide lock and let the slide glide forward slowly, into battery.
The task isn’t complete, though. Affix the thread protector to prevent damage or go with a muzzle brake if the aftermarket kit came with one.
Work the slide several times to ensure it operates freely and as designed. Then hand the unloaded pistol to the customer to ensure they’re satisfied with the looks and balance.
Retailers slow and methodical might have to invest five minutes in the installation. Those fast and familiar with the gun will get it done much faster.
Yes, it’s simple enough that any customer accustomed to routine maintenance can get it done. The big advantage in offering this as a countertop service is that extra barrel length. It may require a new holster — be ready to recommend one.
That added mass on the barrel will also likely shift point of impact slightly. Firing-line time is the only way to ensure it operates smoothly and reliably and determine if the sights need adjustment. That, of course, takes ammo, so point out a few loads you have in inventory.


