Most of your customers likely rely on a polymer-framed pistol for self-defense and carry duty, although there’s no shortage of 1911 owners among them. Confinement to a corner of a safe can be a long-term sentence for those reliable “Slabsides,” with many only seeing daylight on rare rangeside visitation days or when it’s time for routine maintenance.
That second-tier status isn’t due to lack of performance, though. It has, after all, proven itself enviably reliable in combat and criminal encounters for more than a century. If it’s grip surface and comfort an owner cites as the main reason their 1911 is warming the bench, a new mainspring housing might put it back on the playing field. No, the system isn’t quite as modular as the backstrap choices that come with many modern pistols, but the versatility from a 100-year-old design is still quite pleasing.
The process is faster than you think, assuming you stick with a quality, precision-machined aftermarket option. There are plenty available today, in virtually unlimited shapes and sizes — arched, carry cut, checkered, swollen mag well, wearing a lanyard loop and more. Remember, full-size, Commander and Officer 1911s are not identical, so read the packaging carefully before beginning.
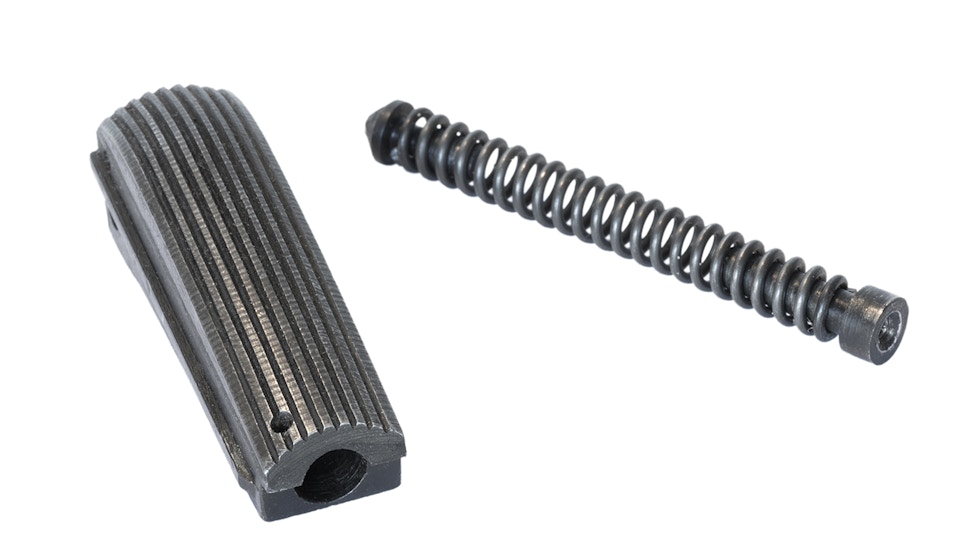
The full-size model seen here shipped wearing a lanyard loop. The selected mainspring housing is free from that nuisance and, as a bonus, is more pleasing to the eye. The change is fast and easy, and it’s a great service for tactical retailers.
Naturally, the steps begin with a focus on safety that includes safety glasses. Springs are involved, so put them on and then, keeping your finger off the trigger, point the pistol in a safe direction and drop the magazine.
Rack the slide back and lock it in the open position. Inspect and double check there is no cartridge remaining in the chamber. Use a flashlight, if necessary, and remove any ammunition and the magazine from your work area.
It’s preferable to place the gun in a vise, but a soft, rubbery surface can work in a pinch. Locate the mainspring housing pin on the grip, which is at the bottom and back of the pistol — in this example adjacent to the lanyard loop.
Drive out that pin using a 3/16-inch punch. It will require firm taps with a nylon hammer. If you’re using a supple surface instead of a vise, only start the pin’s movement. Then remove it with padded pliers from the other side to avoid bending.
Depending on abuse and age, the entire mainspring housing (below the backstrap safety) now slides down and off the gun. The pictured pistol is a 30-year-old bargain-basement import, the victim of serious neglect, and the unit still showed little reluctance moving.
This next step is when springs “sproing.” Use a 1/4-inch punch and apply pressure on the mainspring cap inside the housing. Compress it slightly, then, using a 1/16-inch punch, and working from the exterior side of the housing, push out the mainspring cap pin. It’s much easier with a vice, but if you insist on MacGyvering your counter work, hold the punch upright on your soft work surface, then push the mainspring housing down onto the punch to compress the spring. Maintain balance and you can now push out that pin. It’s not exactly recommended, but I’ve seen it done multiple times.
Gently release pressure on the spring and remove it, the cap and the pin retainer it wears. Note their position to save reassembly time.
Give everything a quick cleaning, add oil and you’re ready to install the new unit. Start by inserting the cap pin into the interior side of the mainspring housing just enough to orient it properly without impeding spring insertion (the pin is small and the interior side is flat). The step’s certainly not mandatory, but it saves effort.
Reassemble the mainspring and pair of parts riding it, and insert into the new housing, ensuring the cap is toward the hole. Apply pressure with the 1/4-inch punch against the mainspring cap and the pin glides in.
Slide the mainspring housing back onto the pistol’s backstrap, but make sure the hammer strut rests on the mainspring cap as it goes on. Apply pressure at the bottom and insert the old housing pin enough to hold the unit in place. Gently tap with a nylon hammer until its center groove snaps into place with the pin retainer and you’re done.
Test the spring is applying proper tension on the hammer and that the new unit doesn’t impede backstrap safety function. When you’re satisfied everything is working correctly, it’s time to send yet another happy customer out the door and recommend a test drive at a nearby range. Don’t forget to mention those FMJs you have in stock, either.


